
Hello! Are you looking to broaden your internet horizon with lightning-fast speeds? Well, you’ve come to the right place. Today we’re talking about how to activate Starlink from Dish and I’ll guide you through it.
Ever thought of streaming movies without the dreaded loading icon or uploading content in a snap? That’s the power of Starlink – and it’s just what I’m here to help you tap into.
Starting off, you need to know that setting up and activating your very own Starlink is quite simple. All it really takes is installing your dish in a clear area where it can “see” the sky, plugging in a few cables, and voila! You’re on your way to fast internet speeds that will have you soaring through web pages like never before.
Why You Might Want to Activate StarLink from a Dish? – The Benefits
When you think about getting your internet from the sky, it can sound pretty cool, right? Well, that’s what activating StarLink using a dish is all about.
Here are some of the perks you get from it:
- Fast Internet: Get speeds that can compete with or even beat your usual home broadband. So whether you are watching videos or just browsing the web, things should be snappy.
- Always Connected: StarLink aims to give you a solid connection no matter where you are. Whether in the city or out in the country, you can stay connected.
- Set Up Anywhere: If you move around a lot or live somewhere with no cables for the internet, this could be perfect for you. Take your dish along and set it up wherever.
- Simple Setup: With just some basic tech skills and following simple instructions, getting started is pretty straightforward.
- Reliability: Say goodbye to outages caused by broken cables on the ground – your connection comes from space!
These points show why activating StarLink using a satellite dish might be something worth considering if good internet is important to your daily life.
Also Read:
Prerequisites for Activating Starlink from Dish
Before you can start enjoying that high-speed space internet, there are a few things you will need to have ready. Here’s what you should gather:
- StarLink Kit: This is a must. Your kit will include the StarLink dish, a mounting tripod, and a Wi-Fi router.
- Clear View of the Sky: Find a spot without blockages from trees or buildings. The dish needs to see the sky to talk with the satellites.
- Power Source: Make sure you have somewhere to plug everything in. You’ll need electricity to power your new dish and router.
- Smartphone or Tablet: You’ll need one to use the StarLink app during setup. It guides you through how to get everything up and running.
- Internet Connection: Seems strange but yes, for activating your new service, you may need an existing internet connection just for initial setup purposes.
After ticking off these items on your list, rolling out your new StarLink connection should be a breeze!
Simple Steps to Activate Your StarLink Using a Dish
Activating StarLink using a dish is not too tricky. If you follow these steps one by one, you should be able to do it without too much hassle:
- Find the Perfect Spot: Pick a spot for your dish with a clear view of the sky. Trees and buildings blocking the dish can mess with your signal.
- Set Up The Dish: Place the dish on its stand or mount it securely if you got one. Make sure it’s stable and won’t tip over.
- Plug In The Cables: Connect the cables that came with your kit from the dish to the power supply and then to your Wi-Fi router.
- Power Up: Switch on the power supply. A light should come on, which means good news – electricity is flowing!
- Download The App: Get the StarLink app on your smartphone; it will guide you through aiming your dish for the best reception.
- Aim Your Dish: With help from the app, adjust where your dish points until it says you’ve got optimal signal strength.
- Connect To Wi-Fi: On any device, look for your new StarLink Wi-Fi network in wireless settings and connect using the password provided.
That’s pretty much all there is to activate StarLink from a satellite dish. If you follow these steps carefully, you should now be ready to enjoy faster internet from above!
Also Read:
Activating Starlink RV Directly From Your Account
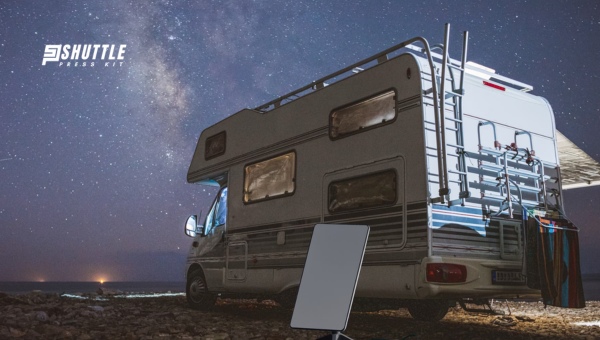
Imagine you’re out in your RV, surrounded by nature. If you want to check in with the world, maybe send an email or watch a video.
That’s where activating Starlink RV directly from your dish comes into play. It connects you back to what matters with just a few clicks.
Step By Step Guide To Activation
Now let me walk you through how to light up that connection:
- Step One: Point your dish towards the open sky.
- Step Two: Make sure you’ve got power running to that dish.
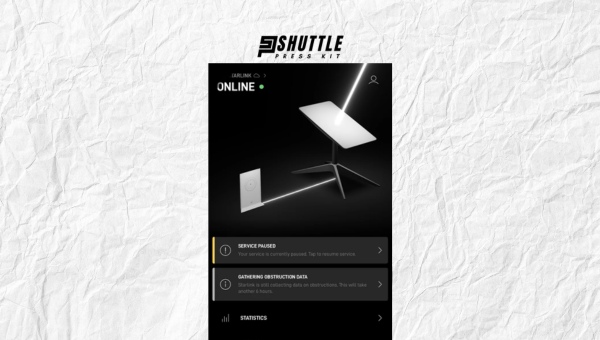
- Step Three: Look for the ‘Settings’ menu on your device that’s linked to Starlink.
- Step Four: Choose the ‘Service’ options from that menu.
- Step Five: Here’s where it gets real – select ‘Reactivate Service.’ A couple of taps, and you’re stepping back online.
It’s smart to double-check every step as you go. This helps make sure nothing slips past and causes hiccups later on.
Troubleshooting Common Issues
When you try to activate StarLink from a dish, sometimes things don’t go smoothly. You might run into some hiccups like not getting a signal or seeing error messages.
But don’t worry – many of these issues can be fixed with some simple steps.
What Should You Do When There’s No Signal After Your Attempted Activation?
If you have set up your StarLink dish and tried to activate it, but there’s no signal, the first thing to do is check your connections. Make sure all the cords are plugged in tight and right.
If everything looks good on that front, the next step is to check that your dish has a clear view of the sky. Trees, buildings, or other obstacles can block the signal.
Once connections are confirmed and there’s a clear line between your dish and space, rebooting can sometimes fix it too. Just turn off your equipment, wait for a minute or so, and then turn it back on again. This basic trick might get things moving.
Resolving Possible Errors Encountered During Activation or Reactivation Process
Did you get an error message when trying to activate or reactivate StarLink? First things first: write down the error message if you can. That way you’ve got something specific to work from when troubleshooting. Often times reading that message carefully can give clues as to what went wrong.
Now for fixing it – restarting devices works here as well; turn them off then back on after a short break. If this doesn’t help, take a look at any instructions you got with your dish for hints related directly to errors during activation.
Sometimes doing an update for your equipment software will resolve these kinds of problems too – just like updates on your phone sort out glitches from time to time.
Also Read:
Frequently Asked Questions
Can I activate Starlink RV on my paused account?
Yes, you can restart your paused Starlink RV account simply by going to the website www.starlink.com. Sign in with your details and follow the steps to reactivate it.
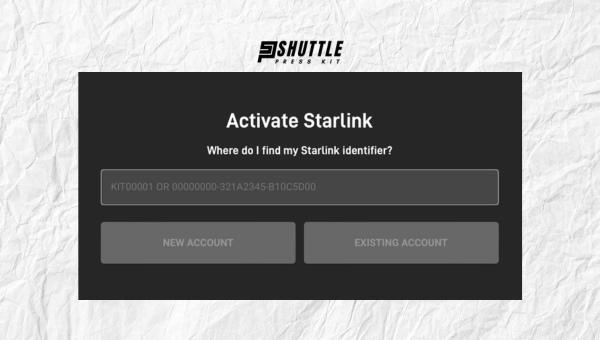
What do I need to do to activate Starlink RV directly from the dish?
To activate Starlink RV directly, connect to your dish’s Wi-Fi network and log into your account through the provided interface. From there, follow the prompts for direct activation.
Is it complicated to activate Starlink RV myself?
No, activating Starlink RV is straightforward. The company provides a step-by-step guide that you can easily follow from the dish or via their website.
After activating my service, how do I get better internet speeds?
To get better internet speeds after activating Starlink RV, place your dish in an open area with a clear view of the sky and away from obstructions for optimal signal strength.
Also Read:
Conclusion
So, there you have it – Starlink RV can now be activated right through your own dish. It’s clear how this service brings fast internet to places where wires won’t reach. The steps are simple, and the benefits are plenty.
Just imagine traveling with reliable internet – that’s a game-changer for road warriors and adventurers alike! The feedback? Most thumbs up from users who are happy to roam without losing touch. Whether you’re restarting or just beginning, Starlink RV directly provides that freedom.
Starlink RV Directly activates seamless satellite internet for travelers – easy setup, consistent connection, and freedom to explore freely.