Ever wonder how all those cool kids are rocking solid internet without a hiccup? What’s their secret, you ask? It’s knowing the ins and outs of something called Starlink Router Settings. Now, hold on, before you say, “Tech is not my cup of tea,” let me tell you, I’ve been there too—a world where words like ‘router’ and ‘settings’ sent chills down my spine.
But what if I told you that with a few simple taps here and a click there, you could be the master of your own cybership? Yes, that’s right! Come aboard as we set sail to the land where strong Wi-Fi signals never die!
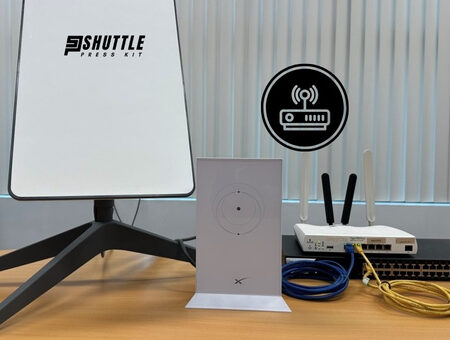
Cracking into your Starlink router settings isn’t some rocket science—it’s actually pretty straightforward. Think of this as your trusty map to buried treasure where X marks the spot. All it takes is connecting your router to power and grabbing either a smartphone or PC.
From there, open up the Starlink app or type in the web address on your browser like any other website. Then log in—usually with info provided when you got the router—and bam! You’re in control.
Accessing the Starlink Router’s Interface
Gaining access to your Starlink router settings is important for you to make sure your network works just the way you want it.
You can do this in two ways: by using the handy Starlink app or through a regular web browser on a computer.
Using the Starlink App
Accessing your router with the Starlink app is simple and convenient. Here are easy steps on how to do it:
- Download the official Starlink app from your phone’s store – either Google Play for Android users or App Store for iPhone users.
- Install and open the app on your smartphone.
- Log In with the account details that you set when you first got your device.
- Once logged in, Find and hit the ‘Settings’ icon – it usually looks like a little gear or cogwheel.
- In here, you’ll see various options to look over – now you’re right where all those important settings are!
Make sure to get this app from trustworthy sources like those mentioned above so everything stays secure and works well.
Through a Web Browser
If you’re more comfortable with using a computer, or if for some reason you cannot use the mobile app, accessing router settings via a web browser is an effective alternative:
- Open any compatible web browser (like Firefox, Chrome, Safari).
- Click up top where website addresses go and carefully type in this URL: https://192.168.100.1 – This takes you straight to your router’s login page.
- When prompted, enter Default Credentials, unless changed:
- Default Username: admin
- Default Password: Check documentation; it may be written behind/underneath the router, too.
Always ensure that ‘HTTPS’ is part of the address – it means everything’s more secure!
So there we have it! Whether on mobile or desktop, accessing those all-important Starlink Router Settings is doable with these basic steps – no tech savviness required!
Also Read: How to Cancel Starlink? – Quick Steps for Opting Out
Navigating Through Starlink Router Settings
Navigating through the Starlink Router Settings is like finding your way around a new town – once you know where the main streets are, getting to your destination is easy.
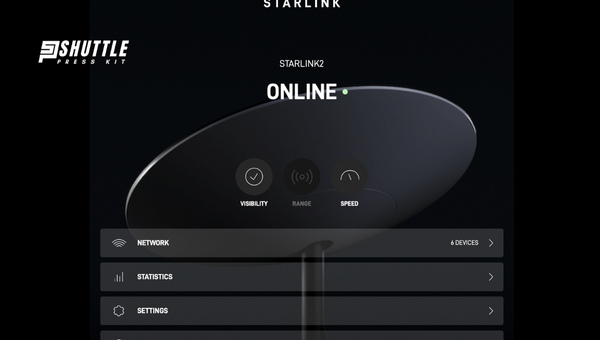
When I log in to the router’s interface, it’s important to get familiar with what pops up first – this is the dashboard.
The Dashboard Overview
The dashboard is like the home screen on your phone; it shows you everything at a glance. Here’s what catches my eye as soon as I log in:
- Network Status: This part shows if your internet connection is up and running. It’s like a health check for your router.
- Device List: Ever wonder who’s using your Wi-Fi? Here, you can see all gadgets – phones, tablets, laptops – that are connected.
- Wi-Fi Settings: This section lets you control how people connect to your internet, kind of like giving keys to friends for your house.
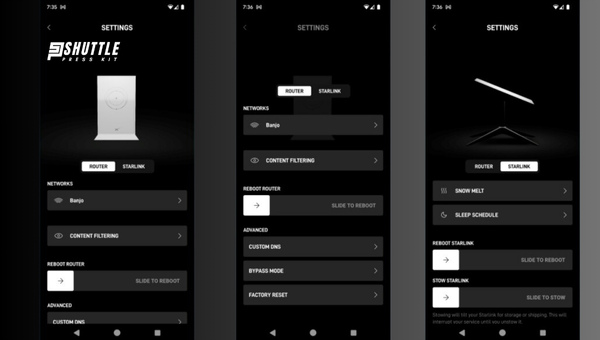
Changing Basic Wi-Fi Settings
Now, let me guide you through changing some basic Wi-Fi settings. Simple changes make big differences in keeping our connection safe and tailored:
- Change SSID (network name): Give your network a distinct name so it stands out from neighbors’ networks.
- Password setup: Choose a strong password so no strangers hop onto your internet-free ride.
- Band selection (2.4GHz vs 5GHz): Pick 2.4GHz for wider coverage – good for houses with lots of walls. Go with 5GHz when close to a router and need fast speeds – think gaming or streaming.
Remember these basic settings help keep things running smoothly without much tech knowledge.
Advanced Configuration Options
If we dig deeper into Starlink Router Settings, I find options that are best handled carefully — these are advanced settings:
- MAC Address Filtering: Use this feature as an extra lock on who gets access by listing allowed devices.
- Port Forwarding: Directs traffic coming into specific ‘port’ numbers straight to certain devices — useful if hosting games or using complex software.
- DNS Settings: Controls how websites’ addresses get translated into numbers the internet understands.
Words of caution: Advanced adjustments can lead to unexpected results if not done correctly; they’re like tweaking engine parts under a car hood – be sure before turning any screws!
Also Read: Starlink Warranty And Claim Guide: Easy Steps Revealed
Frequently Asked Questions
Why can’t I see my Wi-Fi network even after configuring my Starlink router settings?
If you can’t see your Wi-Fi network, double-check that you applied and saved the settings correctly in the Starlink Router Settings. Also, make sure your device’s Wi-Fi is turned on and scanning for networks.
What should I do if my changes in Starlink Router Settings don’t save?
Make sure you click ‘Save’ or ‘Apply’ after changing settings. If changes still don’t hold, restart your router and try again. If problems persist, the router may need a reset to factory defaults.
Can I control who connects to my network through Starlink Router Settings?
Yes, you can manage access to your Wi-Fi by changing the password or setting up MAC address filtering in the advanced configuration options of your Starlink Router Settings.
Are there recommended security practices for managing my Starlink Router Settings?
For security, change default login credentials, create a strong password for your Wi-Fi network, keep firmware updated, and regularly check connected devices via the dashboard in your Starlink Router Settings.
Also Read: Starlink to End the Best Effort Service by 2024
Conclusion
I’ve laid out the essentials for accessing and managing your Starlink Router Settings with ease. The idea might seem tricky, but with a step-by-step approach, adjusting settings turns into a straightforward task. We started by setting up your router correctly and discussed the importance of having the right equipment.
Whether you choose to use the mobile app or a web browser to access your Starlink router’s interface, I walked you through every step. We also tackled changing basic Wi-Fi settings and delved into advanced configurations for those feeling more adventurous.
And remember, if you hit any snags while working with your Starlink Router Settings, troubleshooting steps are your best friend—and as a last resort, resetting the device is always an option. Keep in mind that protecting one’s network is key; ensure that regular security checks are part of your routine.