
Hey there, are you ready to jump into the future of internet connectivity? I know dealing with slow and unreliable internet can be a major pain, especially if you’re in a remote spot. But what if I told you that there’s a way to tap into blazing-fast satellite internet from almost anywhere?
Yes, that’s where the magic of being able to setup Starlink comes into play! This revolutionary technology can change the game for you. Imagine downloading your favorite movies in minutes or having video calls without any lags!
So, how do you bring this high-speed innovation to your doorstep? It’s pretty simple! Once your shiny new Starlink kit arrives, open it up and take everything out. Make sure no parts get damaged during shipping; we want everything in top shape! Find the perfect spot with a clear view of the sky—this is crucial for a strong signal. No worries about tools; just have some basic ones ready for mounting the dish.
Unboxing Your Starlink Kit
When the Starlink kit arrives, there’s a bit of excitement to see what’s inside. It’s like opening a present that’s going to connect you to the world in a whole new way. But before diving into setup, it’s crucial to know what you’re working with.
What’s in the Box?
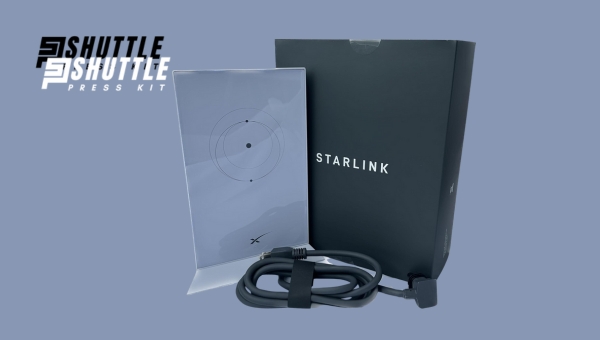
Unboxing your Starlink kit is the first step on your journey to fast internet from space. Inside that box, you’ll typically find:
- The Starlink satellite dish (also known as Dishy McFlatface)
- A tripod mount for setting up your dish
- A Wi-Fi router
- Power supply
- Cables necessary for connection
- A user manual that guides you on how to get everything up and running
Initial Inspection
Before I get too carried away with setting things up, checking all the components for damage is always wise. Why is this so important? Well, if something got hurt during shipping and I didn’t notice right away, it could mess up the whole setup or even make it unsafe. So giving each piece a careful look-over ensures everything is in top shape before moving on with the activation process.
Also Read: Starlink Availability: Check for High-Speed Internet Access!
Preparing for Setup
When you’re getting ready to set up your Starlink Kit, it’s like starting a new project. The first step is to have a good plan. We need two main things: first, finding the best spot for your equipment; and second, gathering any tools that you might need.
Choosing the Ideal Location
Finding the perfect place is very important. You should look for a spot that has clear skies above – no trees or tall buildings blocking the view. This helps make sure your Starlink dish can see the satellites it needs to talk to without any trouble.
Tools You’ll Need
Before you start putting everything together, check if you need any tools. Most of the time, all the important pieces for installation come in the box with your kit. But just in case, have some basic things ready like a screwdriver or a wrench. It’s always better to be prepared so you don’t have to stop halfway through setting up.
Step-by-Step Guide to Setup Starlink
Activating a Starlink kit might seem like a big task, but it’s just a few simple steps. I’ll guide you through each one so you can enjoy fast internet even if you’re out in the middle of nowhere.
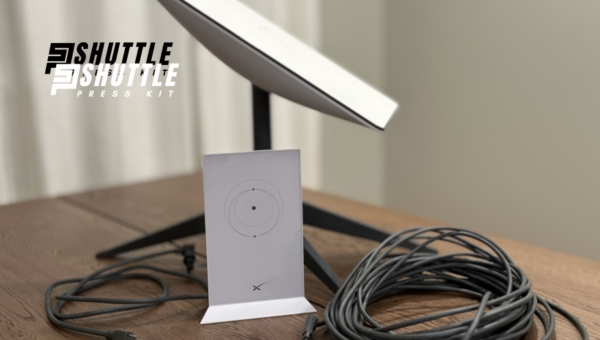
Mounting the Dish
The very first thing is making sure your dish is fixed right. When you place your dish, make certain it’s on stable ground or a strong surface.
Think ahead too – pick a spot where later on, if needed, you can make small moves for an even better signal. It’s all about keeping that connection to the stars as clear as possible!
Connecting Cables and Power
Now that your dish is set firm, we link up the wires. Take care wrapping cables around so they don’t stretch or cut later on.
Hook up the power too and there shouldn’t be any sparks — just smooth sailing (or should I say surfing?).
Downloading the App
Here’s something vital – grab the official Starlink app! This tool makes everything else work together. Whether you use an iPhone or an Android phone doesn’t matter – this app’s for both! Search in the Apple App Store or Google Play Store to download it and move one step closer to browsing at top speed!
Also Read: Starlink Availability: Check for High-Speed Internet Access!
Configuring Your Network Settings
Once I have my Starlink kit all set up, the next big step is getting my devices to talk to it. This means tweaking a few settings so everything runs smoothly.
Launching The App And Device Recognition
When I first fire up the Starlink app on my phone, it needs to “shake hands” with the hardware—that’s just a fun way of saying they need to recognize each other over WiFi or Bluetooth (BLE). Here’s how I do it:
- Turn on WiFi or BLE on my device.
- Open the Starlink app.
- Follow the on-screen instructions which help connect my device to the new Starlink hardware.
It’s kind of like introducing two friends at a party and making sure they get along!
Customizing Settings
Customizing settings is where I can make this internet feel like mine.
- With the app open, I look for ‘Network settings’.
- From there, I tap where it says ‘SSID’—that’s just tech speak for what I want to name my wifi network.
- After that, it’s key time—no secrets here, just setting a password that keeps my connection safe from nosey neighbors.
And just like that, with a couple of taps and some personal touches, my internet is ready to go!
Activation Steps For Your Account
Setting up your Starlink account is a vital step to get your new internet service started. Here’s how you can do just that, by either creating a fresh account or using an existing one.
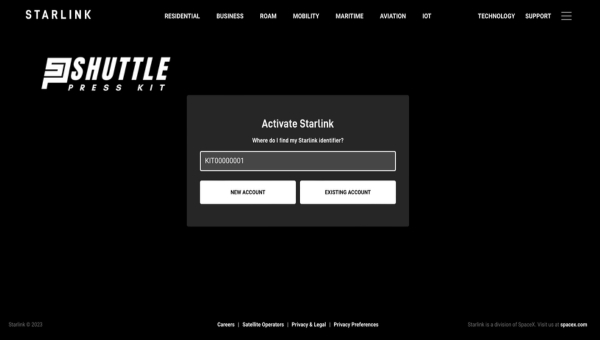
Setting Up an Account to Setup Starlink
When I decide to activate my Starlink kit, the first thing I need to do is make sure I have an account. If it’s my first time, I’ll need to create one; otherwise, logging in works fine.
- Make sure all the details are right: It’s super important to type in my information correctly—things like my name and address. A tiny mistake can cause big problems later.
- Let’s go through each step:
- Visit the official Starlink website.
- Look for the “Sign Up” button if it’s my first time or the “Log In” button if I’ve been there before.
- Put in my name, address, email, and phone number if signing up.
- Choose a strong password that others can’t guess easily.
- If needed, confirm any details via email or text message they send me.
Remembering these steps helps me get set up without any hitches—it’s pretty simple when you break it down like that!
Also Read: Starlink Warranty And Claim Guide: Easy Steps Revealed
FAQs
Do you need insurance for your drone business?
Yes, it’s smart to have insurance for a drone business. This helps protect you from costly damages or legal trouble if an accident occurs.
When don’t you need drone coverage?
If you’re flying drones purely as a hobby, indoors, or in an area where no risks are posed to others or their property, you might not need drone insurance.
What is personal drone insurance?
Personal drone insurance covers damage or injury claims when using the drone for non-commercial purposes, like recreation.
What is commercial drone insurance?
Commercial drone insurance protects against risks that arise during business-related use, such as aerial photography services.
Also Read: How to Cancel Starlink? – Quick Steps for Opting Out
Conclusion
Activating a Starlink Kit is a surprisingly straightforward process. With the details provided, anyone can get their satellite internet up and running without too much trouble. Having fast internet thanks to a Starlink dish can be incredibly valuable, especially in remote places where traditional connections fall short.
From unboxing to setting up an account and troubleshooting common problems, each step is easy to handle. Remember, success relies on proper installation and occasional maintenance for optimal performance. In no time at all, you can enjoy reliable and high-speed internet access wherever you are.