Have you ever wondered how to secure a faster internet connection without the hassle of ground clutter? Imagine a sky with no limit to your browsing speed, thanks to one simple addition to your roof—the Starlink Roof Mount.
Let me catch your interest by saying this isn’t rocket science; with the right tools and some basic steps, you can boost your internet in no time! Looking to set up your own Starlink Roof Mount? First things first, pick the perfect spot on your roof that’s got clear access to the sky. You’ll need some basic tools—a drill, screws, and a mount kit.
The process involves securing the mount firmly onto your roof and attaching the Starlink satellite dish to it. Just like that, you’re all ready for uninterrupted sky-high internet speeds! Simple as pie!
Installing Starlink on Your Rooftop And Various Options To Install
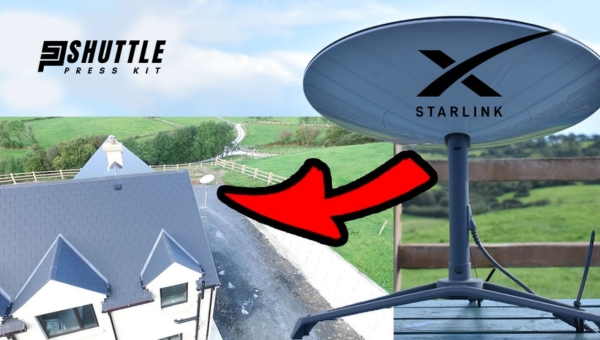
Mounting your Starlink satellite on the roof offers the clearest signal reception by providing an unobstructed view of the sky. This method entails using a specialized mount to securely attach the satellite dish above ground level, ensuring optimal connectivity.
Several mounting options are available for rooftop installation, each designed to cater to different roof types and structural requirements. Careful selection and installation of these mounts are crucial for both signal integrity and safety, allowing you to enjoy a seamless internet experience with Starlink.
1. J – Mount
The J-mount is a versatile mounting option widely used for installing satellite dishes, including those for Starlink internet service. Its design allows for flexible placement on various surfaces and angles, making it an excellent choice for securing your dish in the ideal location for optimal signal reception.
Here’s a simplified guide to installing a satellite dish using a J-mount:
- Select the perfect location: Choose a spot with minimal obstructions blocking the sky view where your dish can have a clear line of sight to satellites.
- Prepare your tools and hardware: Depending on the surface (wood, concrete, etc.), gather appropriate fasteners such as wood lag screws or concrete anchors.
- Position the J-mount: Place it on your chosen spot, using its base as a template to mark where holes need to be drilled.
- Drill pilot holes: For surfaces requiring screws or anchors, pre-drill pilot holes to ensure easy and secure fastening of the mount.
- Securely attach the mount: Use lag screws or suitable fasteners to firmly attach the mount to your selected surface.
- Adjust and level the mast: Before fully tightening all nuts, use a spirit level to make sure that the mast is perfectly vertical for optimal dish alignment.
- Mount and align your satellite dish: Carefully place your satellite dish onto the mast of the J-mount, then adjust its angle according to installation guidelines specific to your service provider.
By following these steps accurately, you can ensure stable installation of your satellite dish using a J-mount.
Also Read: Starlink’s Rivals and Competitors: Who’s Challenging SpaceX?
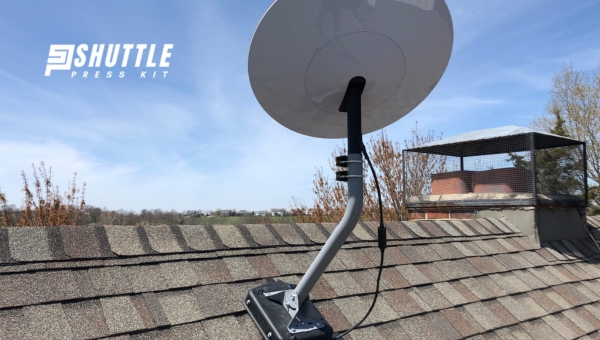
2. Flashing Mount
The flashing mount kit is an essential component for securely installing the Starlink on your roof, ensuring both stability and weather resistance.
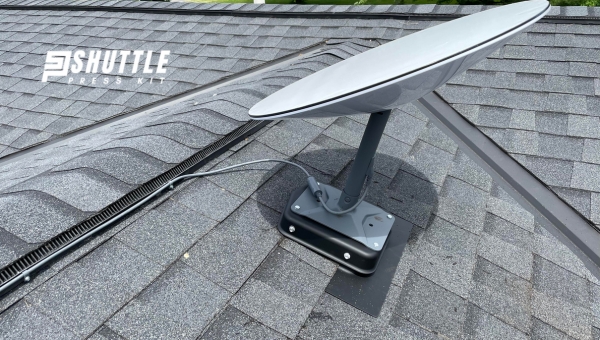
It’s designed to integrate seamlessly with your roofing materials, providing a solid foundation for your Starlink dish while preventing water intrusion.
Here’s how you can successfully install a flashing mount for your Starlink:
Preparing the Mount
- Align the volcano mount with the mount lid.
- Secure them together using provided screws and a wrench.
- Attach the foam gasket to the inside of the mount by peeling off its backing.
Installing on The Roof
- Locate a roof beam close to where you want to install.
- Use the center tracing tool aligned with a shingle on that beam, then trace its outline onto the roof.
- Cut through this traced outline with a knife, careful to only remove the top layer of shingles and avoid damage to underlying layers.
- Pry up the top layer shingles sufficiently to fit in your flashing mount.
- Drill into designated spots cleared from removing shingles for securing the mount.
- Slide in and position your flashing mount, ensuring its bottom part goes under adjacent upper-layer shingles for better waterproofing.
- Fix it firmly in place using truss head screws as per the instructions provided in your kit.
- Use roofing cement around the edges of the mounted area before replacing any disturbed or removed shingles, ensuring there is no exposed area left around it.
After securing Sstarlink’sDish to this robust base following additional guidelines provided with Dish, you’ll have enhanced signal quality and peace of mind knowing it’s been installed optimally against elements.
3. Pole Mount
Installing a Starlink system using a pole mount is an effective way to ensure optimal satellite signal reception, especially in areas with clear, unobstructed exposure to the sky.
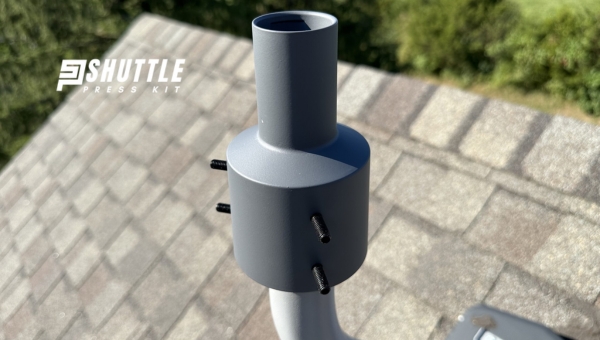
- Gather Necessary Materials: Before beginning, ensure you have all the components needed for installation. The kit typically includes top and bottom tubes for the pole, a shovel, a mortar hoe, gloves, a level tool, concrete mix, and a mixing trough. Additionally, having water on hand is crucial.
- Assemble the Pole: Connect the bottom tube into the top tube firmly. Make sure their connection is tight and secure by applying adequate force or tapping them against a hard surface.
- Select an Installation Site: Choose an area with solid ground footing for your pole mount; avoid installing over gravelly areas or loose soil that may shift over time. A stable foundation is vital for long-term durability.
- Excavate Appropriately: Dig a hole where your pole will be positioned—aiming for about 2 feet deep and 1.5 feet wide should suffice to provide enough room for both the pole base and surrounding concrete.
- Position Your Pole: Place your assembled pole in the center of your excavated site. Utilize your level tool to confirm that it stands perfectly vertical before proceeding further.
- Prepare Concrete Mixture: Following precise ratios as instructed (usually found on your concrete mix packaging), combine water with your concrete mix until reaching an even consistency.
- Secure with Concrete: Pour your mixed concrete around the base of your positioned pole within the hole—ensure it fully encapsulates this bottom portion without overflow beyond the necessary coverage area.
- Allow Time to Settle: Hold or support the pole in its upright position as recommended until it’s firmly set within its new concrete base. Leaving it overnight often ensures adequate curing time without any disturbances altering its alignment.
Following these steps carefully when installing through a Pole Mount method with Starlink or similar systems ensures not only an enhanced connection due to minimized obstructions but also provides lasting support against environmental factors like wind and weather changes.
Also Read: How to Reboot Your Starlink Internet? – Quick Fixes & Tips
4. Tripod Mount
The tripod mount serves as a versatile and stable solution for installing satellite antennas, including Starlink devices, on flat surfaces.

- Choose an Optimal Location: Start by picking a spot that ensures a clear view of the sky. Obstructions can hinder satellite signal quality, so aim for open spaces.
- Assemble the Tripod: Slide each leg into the tripod base until they lock securely into position. Make sure all legs are properly extended to create a stable foundation.
- Level the Tripod: Place a bubble level on top of the tripod. Adjust the legs until the bubble is centered, indicating that the tripod is perfectly level. Tighten any adjustment knobs to secure this positioning.
- Secure With Stakes (if applicable): For additional stability outdoors, use stakes through provided holes in the pivot feet of each leg to anchor down your setup onto soft ground surfaces.
This concise guide outlines primary steps to follow when setting up your tripod mount efficiently – ensuring your antenna gets optimal reception for superior performance.
5. Chimney Mount
A chimney mount offers a strategic solution for securing an additional mast or antenna on your home’s chimney, providing the elevation needed for optimal performance without drilling into your roof.
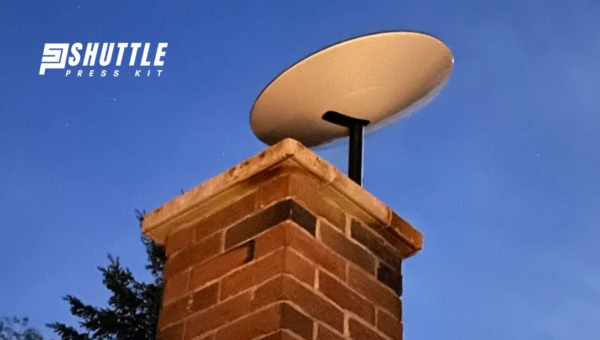
Made of galvanized steel to resist rust and corrosion, these mounts utilize straps to securely attach to a chimney, accommodating various shapes and sizes. This type of mount is ideal for extending the reach of devices like the Starlink dish beyond ordinary limits.
Installation Steps:
- Prepare Tools: Gather necessary tools such as vise grips, hammer, tin snips (for cutting metal), tape measure, and wrench.
- Join Masts: If using more than one mast section, connect them by fitting the swaged end of one into the round end of another. Use a hammer (with a piece of wood for protection) to securely join them.
- Secure Chimney Bracket: Insert strap bolts through the holes in the chimney bracket. Adjust so that about ¼ inch protrudes through external lock washers into nuts.
- Install Steel Strap: Loop the steel strap through a strap clip and back again, bending it back over to crimp securely. Wrap around the chimney without twisting.
- Bracket Positioning: Ensure brackets are spaced at least 18 inches apart on your chimney for stable support. Tighten stainless steel straps evenly while centered on bricks rather than mortar joints.
- Mast Insertion: Place your mast’s bottom end into assembled brackets firmly; use the U-clamps provided in your kit to fix it in place securely.
This straightforward process enables homeowners or installers to make effective use of vertical space provided by chimneys for mounting purposes with ease and stability.
FAQs
What is a Starlink Roof Mount?
A Starlink Roof Mount is a device that holds your Starlink satellite dish securely on your roof for optimal internet signal.
Can I install a Starlink Roof Mount myself?
Yes, you can do it yourself with basic tools, following the guidelines provided by Starlink.
Do I need professional help to install my Starlink Roof Mount?
Professional help isn’t necessary if you’re handy and follow safety measures, but it is recommended if you’re unsure.
Will the Starlink Roof Mount work on any roof type?
The mount is designed to fit most roof configurations but check compatibility with your specific roof type before installation.
Also Read: Amazon’s Project Kuiper vs Starlink: Showdown Unpacked
Conclusion
A Starlink Roof Mount is essential for getting the best signal for your internet needs. Understanding how it works and the various ways you can set it up yourself is crucial.
Although professional installation is an option, many users find success in following step-by-step DIY guides or using simple tools to mount their satellite dishes securely on the roof.
Remember to prioritize safety and follow instructions carefully for a successful setup. With this knowledge, I’m confident that you can enjoy high-speed internet from nearly anywhere.