Let me guide you through a super easy way to set your internet soaring! Ever heard of the Starlink Volcano Mount? Well, stick with me, and not only will I show you what it is, but I’ll also spill the beans on how to install it yourself. Who knew that something called a ‘volcano mount’ could be so simple to work with?
Getting your Starlink system up and running without a fuss is easier than you might think! Just secure the Volcano Mount on a sturdy surface, align the dish for optimal signal reception – remember, clear views of the sky are crucial – and then route the cables neatly. Follow this roadmap to steady and reliable connectivity. It’s a no-sweat task that rewards you with out-of-this-world internet speed!
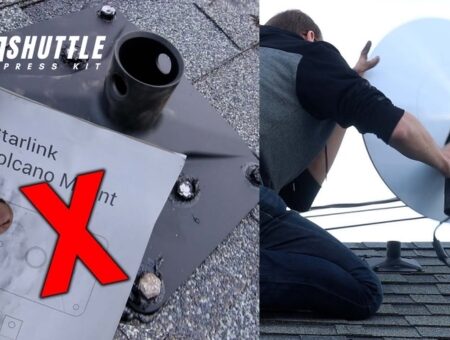
What is Starlink’s Volcano Mount?
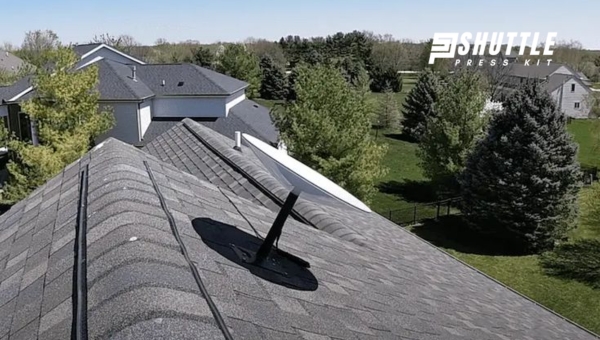
The Starlink Volcano Mount stands as a popular choice for those looking to securely set up their Starlink satellite terminals. This special mounting option is crafted with precision to fit the unique requirements of setting up a high-speed internet connection via SpaceX’s innovative satellite broadband system.
The design and functionality of the volcano mount prioritize stability and ease, catering to homeowners around the world who seek a reliable and straightforward solution for their satellite internet needs.
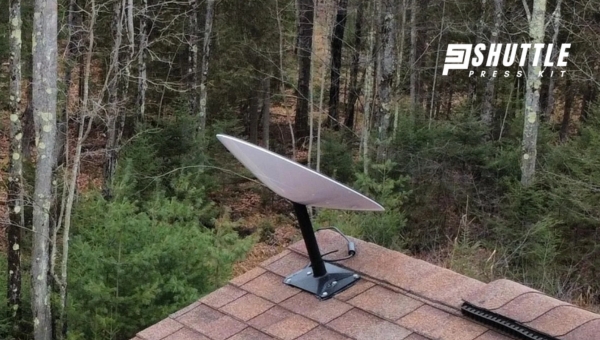
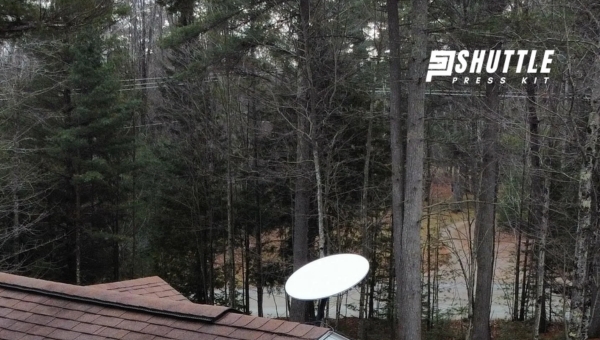
Distinguished by its robust construction and straightforward installation process, the volcano mount ensures that the terminal is kept in a steady position, allowing for an uninterrupted line of sight to the satellites in low Earth orbit.
Given its name due to its resemblance with an actual volcano’s shape, it’s specifically engineered to anchor onto rooftops securely, mitigating concerns related to environmental elements such as wind or rain. Its prowess lies in its simplicity and efficiency—providing users with not just a piece of equipment but peace of mind that their connection will remain constant and strong.
Also Read: Amazon’s Project Kuiper vs Starlink: Showdown Unpacked
Things to Consider When Choosing a Volcano Mount
Selecting the right volcano mount for your Starlink satellite dish is crucial in ensuring optimal signal reception and overall satisfaction with your internet service. The “volcano mount” refers to a specific type of stand or bracket designed to securely hold and position the satellite dish, often resembling a conical shape akin to that of a volcano. Here are key considerations for making an informed choice:
- Compatibility with Starlink Dish: Ensure the mount you’re considering is designed to work with your version of the Starlink dish. Compatibility is essential for both physical fit and connectivity purposes.
- Installation Location: Assess where you plan to set up your dish. Factors such as elevation, obstructions (trees, buildings), and local weather conditions (wind, snow load) will influence which mount suits your needs best.
- Durability and Materials: Look for mounts made from materials capable of withstanding the environmental conditions they’ll be exposed to. Durable construction translates into longer service life and fewer replacements over time.
- Ease of Installation: Consider how straightforward the installation process appears. Some mounts might require professional assistance due in part to their complexity or the necessity for specialized tools.
By keeping these factors in mind, you can select a volcano mount that not only meets but exceeds your expectations, contributing significantly toward an uninterrupted high-quality satellite internet experience offered by Starlink.
Installing Starlink Volcano Mount
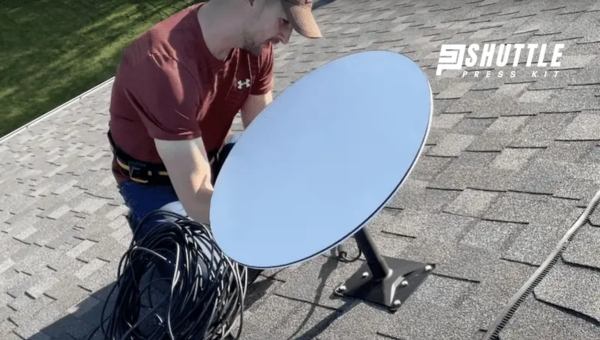
The Starlink Volcano Mount is an essential component for anyone setting up their Starlink system for optimal satellite internet connectivity. This mount is specifically designed to securely anchor your Starlink dish, ensuring stable and consistent internet performance. Here’s a concise guide on installing it correctly:
- Gather Necessary Tools: Before beginning the installation, ensure you have all required tools including a ½ inch socket wrench, 5/32-inch drill bit, stud finder, and drill.
- Locate Suitable Installation Area: Utilize the stud finder to locate studs on your roof where the mount can be securely attached.
- Mark Drill Points: Position the volcano mount over the located stud and mark six points where you will drill holes for mounting.
- Drill Holes: Carefully drill holes at each of the marked points using your drill and drill bit.
- Prepare Sealing Tape Balls and Strips: Create oversized balls from sealing tape squares and affix them over each hole, making sure they overlap at the edges. Then place two sealing tape strips across these areas for extra protection against water ingress.
- Fix Volcano Mount with Lag Bolts: Line up the holes in your volcano mount with those drilled into your roof. Securely tighten each of the six lag bolts until snug plus an additional ¼ turn to ensure stability.
- Place Equipment in a Carrying Bag for Easy Transport: Pack all necessary equipment into a carrying bag for convenient transportation to your roof or installation site without directly placing any components onto potentially damaging surfaces like a rough rooftop.
- Install Starlink Mast onto Mount: Carefully insert the Starlink mast into its dedicated slot at the center of your installed volcano mount.
- Route Connected Cable Indoors: Lead one end of your internet cable into your home to connect with the power supply while employing wall clips to neatly secure this cable along its route towards your router inside.
This simplified guide facilitates a smooth installation process of your Starlink Volcano Mount, leading towards the successful setup of your satellite internet system. Following these steps helps ensure that you achieve optimal connectivity and enjoy uninterrupted access to high-speed internet service provided by Starlink.
Also Read: ISEKIE Starlink Router Wall Mount: Optimize Your Space and Review!
Expenses associated with Starlink Volcano Mount
The financial implications of erecting the Starlink Volcano Mount, a critical component necessary for enhancing global internet connectivity via SpaceX’s satellite constellation, remain under wraps. Scheduled for construction in Hawaii, this large-scale dish is pivotal for the reception and transmission of satellite signals.
While the exact figure remains speculative, it’s anticipated that the investment needed to bring this project to fruition will be substantial.
In addition to the procurement and installation costs of the Volcano Mount itself, there are additional financial considerations at play. SpaceX is tasked with developing a specialized facility to accommodate both the mount and its corresponding support mechanisms.
The financial commitments extend beyond the initial setup; ongoing operational and maintenance expenses also factor into the total cost calculus associated with this ambitious infrastructural endeavor.
Safety Protocols Associated With Volcano Mount
Exploring a volcano, especially active or dormant ones, involves risks due to sudden eruptions, gas emissions, and potential lahars or lava flow.
- Stay Informed About the Volcano’s Activity: Regularly check updates from reliable geological services or local authorities regarding the volcano’s status. Be aware of any recent activity that might indicate an increased risk of eruption.
- Maintain a Safe Distance: Adhere to exclusion zones established by local authorities. These zones are based on scientific analysis and are meant to keep individuals at a safe distance from potential hazards.
- Bring Protective Gear: Equip yourself with helmets, gas masks, and eye protection to shield against falling ash or rocks and harmful gases that volcanoes can emit.
- Follow Established Trails: Stick to paths marked for visitors. Straying into restricted areas not only increases your risk but can also lead to legal consequences.
- Prepare for Quick Evacuation: Familiarize yourself with evacuation routes and plans beforehand. Always have an emergency kit ready that includes water, food supplies, first aid resources, and communication devices.
By following these essential safety protocols, individuals can minimize their risk while exploring volcanic areas. Always prioritize safety over curiosity by respecting guidelines set by authorities and experts in volcanic activities.
Also Read: Low Capacity vs High Capacity Starlink: Optimize Your Choices
FAQS
How do I install the Starlink Volcano Mount?
Installation involves securing the mount on a flat surface or roof peak with appropriate screws or bolts, then attaching and adjusting your Starlink dish for optimal sky visibility.
Can I use the Volcano Mount in high-wind areas?
Yes, the Volcano Mount is engineered to withstand high winds when properly installed, making it ideal for locations prone to harsh weather conditions.
What is Starlink Volcano Mount?
The Starlink Volcano Mount is an accessory designed for mounting the Starlink satellite dish atop structures like roofs or slopes, resembling a volcano’s shape to provide stability and optimal positioning.
Where can I purchase a Starlink Volcano Mount?
The Volcano Mount can be purchased directly through the official Starlink website or authorized retailers, subject to availability in your region.
Conclusion
I’ll wrap this up by saying installing the Starlink Volcano Mount doesn’t have to be complicated. By following a simple guide and taking precautions during your DIY installation, you’ll ensure a safe and secure setup for your internet connection.
Remember to pick the best spot on your roof, avoid any obstacles, and have the right tools ready. With patience and careful execution, you’ll enjoy fast internet from the comfort of your home in no time. It’s all about taking it step by step and not rushing the process.