
Have you just received your shiny new Starlink kit and can’t wait to dive into high-speed internet access? Setting up your own satellite internet might seem daunting at first, but fear not! This Starlink Setup And Installation Guide is your trusty sidekick in making the process smooth and hassle-free.
By the end of this read, you’ll transform from a newcomer to a nearly pro-level installer, fully equipped with knowledge on assembling and activating your gateway to the web.
Understanding the components of your Starlink kit and finding that perfect spot for installation are pivotal steps that could make or break your experience with satellite internet. Here, we present a simplified breakdown, ensuring you get through the initial setup without a hitch.
In addition to highlighting essential installation steps, this guide will offer practical advice on optimizing placement for unparalleled speed and connectivity. So buckle up for an enlightening journey towards unlocking stellar internet speeds at home with our comprehensive guide.
Starlink – A Quick Overview
Starlink is a new way to connect to the internet, and it’s quite different from what most of us are used to. Instead of using cables that run across the ground or under the sea, Starlink uses satellites in space. Yes, you read that right – space! These satellites are sent up into the sky by a company called SpaceX, which Elon Musk owns. The goal? To provide fast internet to every corner of the world, even places where it’s hard to get.
So, how does this work? Let’s break it down: when you sign up for Starlink, you get a special kit. This isn’t your usual internet setup kit; it includes a small flat dish that looks quite futuristic. This dish talks directly to the satellites whizzing around above our heads in space.
The exciting part is that these satellites cover almost every bit of Earth. So whether you live in a busy city or out in the countryside where other internet services can’t reach you easily, Starlink might be able to help.
Using something like Starlink feels like stepping into a science fiction story because it kind of is! But here’s why many people are talking about it: it promises very fast and reliable internet speeds – something that not all traditional services can say they offer everywhere.
What’s in the Box – Starlink
When your Starlink kit arrives, you’re at the starting point of a new journey into fast internet access. Unpacking it is the first step.
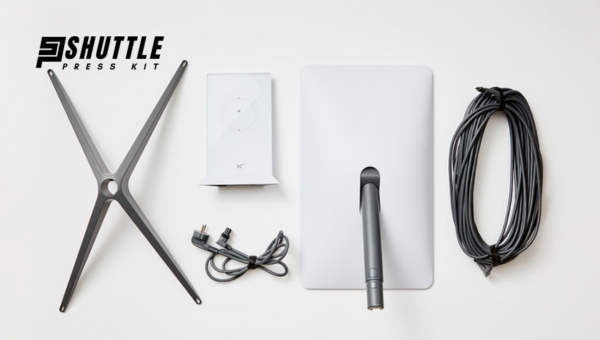
Let me walk you through what’s inside the box and how to handle each component with care.
- The Starlink Dish: Inside your package, the most noticeable item is the Starlink Dish. It’s not an ordinary dish; it’s your gateway to high-speed internet from space! Be gentle when you take it out. It looks like a big, flat circle, or sometimes, people call it a “UFO” because of its shape and futuristic design.
- The Router and Power Supply: Next, find the router and power supply. These are essential for making your internetwork. The router might look similar to other routers but remember, this one connects to satellites above Earth! Carefully remove them from their packing and place them next to your dish.
- The Tripod or Dish Stand: Lastly, there’s a tripod or dish stand which often goes unnoticed initially but holds great importance for setting up your Starlink Dish firmly outside or on your roof. It’s usually sturdy yet simple in design – meant for easy assembly but ensures stability for the dish against wind and weather.
Remembering these steps will help make sure you’ve got everything ready before moving on to finding the perfect spot for your setup.
Also Read: What is Starlink’s Aviation Service?
What is the Right Location for Your Starlink Dish?
Finding the right spot for your Starlink dish is very important. You might wonder, “Why does it matter so much?” Well, the place you choose can affect how fast and stable your internet connection is.
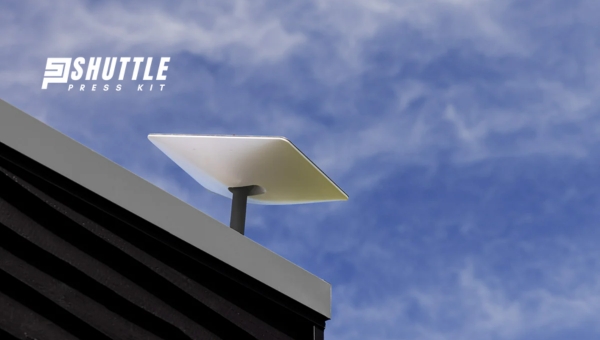
The best location for your Starlink dish is somewhere with a clear view of the sky. This means no trees, buildings, or anything else blocking its view upwards. The reason behind this need for a clear sky is simple: Starlink works by connecting to satellites that move around the earth high up in space.
So, if anything blocks this connection, like a tall tree or part of your roof, it might slow down your internet or cause it to stop working sometimes.
Now, you might think about putting it right in the middle of an open space, which seems like a good idea but consider this too: where you live plays a role. If there are many days when the weather is bad where you live—like heavy rain or snow—the dish needs some kind of shield while still keeping that clear path to talk to satellites.
Also, think about reaching your dish after installation; placing it somewhere easy for you to access makes sense if you ever need to clean it or check on something.
Also Read: What is Starlink Priority Plan? High-Speed Heaven for Users
Step-by-Step Guide on How to Install and Set Up Your Starlink Internet
Setting up your Starlink Internet can feel like a big task. But don’t worry! I’ll guide you through each step, making it easy. Here’s how you can get your Starlink up and running:
- Unbox Your Kit: Open the box your Starlink came in. You’ll find a dish, a router, a power supply, and a stand.
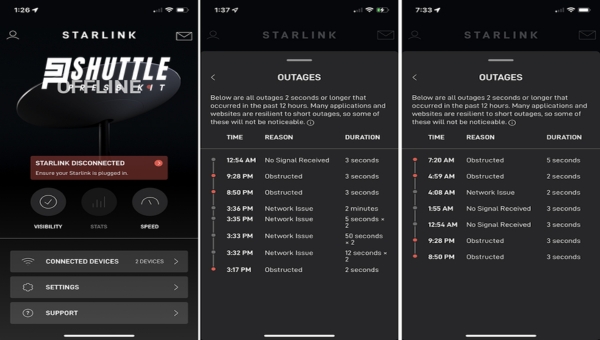
- Download the App: Before doing anything else, download the Starlink app on your smartphone. It will be very helpful.
- Pick the Right Spot: Use the app to find the best location for your dish. This place should have a clear view of the sky.
- Set Up The Stand: Put together the stand or tripod that comes with it. Make sure it’s steady.
- Place Your Dish: Attach the dish to the stand you just set up. Point it upwards towards an open area of sky.
- Connect Cables: There are two main cables – one goes from the dish to the power supply and another from the power supply to your router.
- Power On: Plug your power supply into an outlet to turn on your setup. (Note: Wait for about 15 minutes as initially powering up might take some time.)
- Install Updates if Any: The first thing after turning on could be software updates. Let them install if any.
- Connect to WiFi Network: Look for ‘Starlink’ in WiFi networks on any of your devices – laptop, phone, or tablet. (Note: Use the password provided in the manual or app for initial connection)
There you go! You’ve just completed setting up Starlink Internet at home by following these steps closely. Remember, patience is key during this installation process as finding an optimal location can take time but ensures high-speed internet access once done right.
Is Starlink Worth It?
Determining the worth of Starlink involves considering its ability to deliver fast internet to remote areas against its cost. As SpaceX’s ambitious project, Starlink leverages a constellation of satellites aimed at providing high-speed internet globally, particularly in underserved regions.
For those in such locations, facing limited or poor-quality internet options, Starlink offers a significant improvement, potentially revolutionizing access to broadband services. However, its value proposition is nuanced; the initial setup and ongoing subscription costs are higher compared to traditional urban broadband offerings.
Therefore, while Starlink could be invaluable for some due to its unique benefits in connectivity deserts, urban users with existing high-speed options might find it less compelling from a financial standpoint.
Also Read: Starlink vs Viasat: Which Satellite Is Right for You?
Frequently Asked Questions
What are the requirements for Starlink installation?
To install Starlink, you need a clear view of the sky without obstructions, a safe location for the dish, and access to a power source. The kit includes all the necessary components.
How do I setup my Starlink router?
Setting up your Starlink router involves connecting it to the satellite dish using the supplied cables. Then, power up both devices and follow the setup instructions in the Starlink app.
Do you need an electrician to install Starlink?
In most cases, you won’t need an electrician to install Starlink as the system is designed for easy DIY installation. However, if you have unique electrical requirements or need custom wiring or outlets installed, seeking professional assistance is advisable.
Can I install Starlink myself?
Yes, most users can self-install their Starlink kit following the detailed instructions provided in the mobile app or user guide. It’s designed to be user-friendly with minimal tools required.
How much electricity does Starlink need?
Starlink’s typical energy consumption ranges from 1.2 to 1.8 kilowatt-hours (kWh) per day, depending on usage patterns and connected devices’ needs. This equates to roughly 50W continuous draw during operation.
Also Read: Starlink Cable Routing Kit: Easy Install Guide!
Conclusion
After going through this Starlink setup guide, you’re ready to enjoy fast and reliable internet. Whether you’ve installed it on your roof or have it set up in your backyard, you now know where and how to place your equipment for the best connection.
Remember, choosing the right plan for you matters a lot – consider what you’ll be using the internet for and pick accordingly.
Don’t forget about taking care of your gear; a little maintenance can go a long way. If things get tough, there’s always customer support waiting to help out. Now kick back and enjoy surfing the web like never before!