Do you find yourself wondering about the best dish placement for your newly acquired Starlink system? If you’re like me wanting to make the most of your internet experience, then it’s crucial to understand how the ideal Starlink Dish Placement can significantly amp up your performance.
The right positioning not only ensures stability but also optimizes signal reception, enabling a smoother and more reliable connection.
Responding to our catchy guide title – ‘Which Way Should It Face?’, I’d say that the direction mostly depends on where you are in relation to the equator. However, it’s not as simple as just turning it north or south.
Thankfully, though, your Starlink dish does most of this tedious orientation job for you with its self-aiming mechanism. But before it gets there, having an optimal placement is your responsibility!
Understanding the Optimal Starlink Dish Placement
Optimal Starlink dish placement is crucial to having a strong and stable internet connection.
Sure, we can appreciate the brilliant engineering behind this space-age technology, but all that means little if we don’t give attention to where it sits.
Importance of Proper Starlink Dish Placement
The location of the Starlink dish is not about aesthetics. It’s all about functionality. With a satellite like Starlink, a clear line of sight to the Northern sky (or Southern, depending on where you live!) is required for strong signal coverage.
The optimal placement ensures your satellite stays connected with no interruptions from trees, buildings, or any other physical obstructions in its path.
The Process of Mounting the Dish
Now that we have discussed how important placement is, let’s delve into the process of correctly mounting your dish. This process may seem daunting, but fear not! I am here to guide you so it becomes a smooth ride rather than a bumpy one.
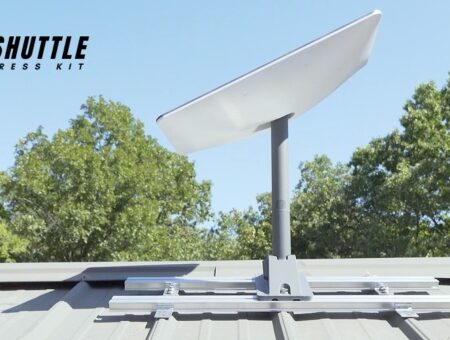
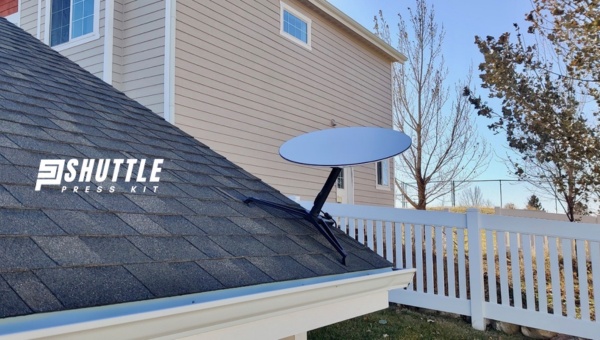
- Selecting the Location: Take your time in choosing a spot where the satellite has an unobstructed view of the sky.
- Readying for Installation: Gather all equipment supplied with your Starlink Kit, including the dish, mounting bracket, and screws.
- Mounting: Attach the provided bracket to your chosen surface using screws. Make sure it’s tightly secured before proceeding further.
- Placing Your Dish: Carefully attach your Starlink dish to its mount point, taking care not to damage any connection points on either side.
- Getting Connected: Finally, connect power and data cables from your Dishy (affectionately nicknamed) in appropriate slots and power it up.
The central aspect here is ensuring that there are no obstructions between Dishy and the sky because unobstructed access equals stellar connectivity! Fun fact: Rain or light snow won’t disrupt service due to the built-in self-healing capabilities of Dishy.
Also Read: Starlink Accessories Buying Guide: Ultimate Tips and Tricks
Essential Factors While Deciding a Place for Your Starlink Dish
Picking the right place for your Starlink dish isn’t something you do randomly. It’s a careful process, and here’s why it matters so much.
Checking the Surface for Mounting
One of the most critical steps in getting an optimal Starlink dish placement is mounting it on an appropriate surface. This is so important because the type of surface can significantly impact the signal reception. Here are some things to keep in mind:
- Flatness: Always look for a flat, even surface to mount your Starlink dish. An uneven surface could lead to problems down the line.
- Stability: The integrity and stability of the chosen area matter. The stronger and more secure, the better it is to hold your high-tech satellite device.
- Material: Different materials have different absorption rates, reflecting satellite signals differently. Therefore, always opt for non-metallic surfaces as they provide minimal interference.
While these may seem minor points, but trust me when I say – they play an enormous role in ensuring superior connectivity!
Surveying for Obstructions
Now that you have found a perfect flat spot, let’s make sure nothing stands between you and your crystal-clear Internet connection! After all, any obstruction can weaken or completely block satellite signals.
This means I need to look out for buildings, trees, or even power lines around my chosen site that could get in my way. A clear sky view from horizon to horizon gives me the best results with my Starlink dish placement.
So here is what I do regularly:
- Perform frequent monitoring, especially during changing seasons when trees blossom or snowfall happens.
- Use online apps designed specifically to identify potential obstructions from any proposed site.
3.. Periodically reassess the current setting if there are recent constructions nearby – new building structures might threaten my smooth internet connection!
The bottom line is that Stellar Internet access is possible with meticulous Starlink dish placement. I don’t want to miss out on any online experiences just because I didn’t plan my dish placement correctly!
Examining How a Starlink Dish Points?
When it comes to the correct orientation of your Starlink dish, you might be thinking: which way should it face? North or South? This question is very important, as the direction determines if your dish will have a clear view of the satellite.

Generally, Starlink dishes do not point toward any particular cardinal direction, such as north or south. Instead, their job is to look up and face the sky. Surprised? Don’t be!
Here’s an easy way to understand this concept: Picture yourself lying flat on your back in an open field, staring straight up at an enormous sphere of satellites revolving around our planet. If you were a Starlink dish, that’s pretty much what you would see.
Hence, contrary to traditional satellite receivers that need careful alignment to a stationary geostationary satellite, a Starlink dish has full freedom– yes, I said it, full freedom – in terms of directionality. It only needs unrestricted access to as much sky as possible for optimal performance.
Therefore, next time someone asks you, they should point their installation north or south for proper Starlink dish placement; remind them their ultra-modern antenna simply just faces ‘up.’
Also Read: Standard Actuated Starlink Kit Contents: Everything You Need
Aiming Your Ultra-Modern 20th Century Starlink Satellite
Modern technology has enabled the creation of equipment that feels like it’s straight from a sci-fi film. Yes, I’m talking about the Starlink dish.
One vital feature that makes the dish super user-friendly is its self-aiming ability.
The Role of Self-Aiming Mechanism
In stark contrast to conventional satellite systems, the ultra-modern 20th-century Starlink dish comes with an innovative self-aiming mechanism. It is engineered to lock onto satellites in space without any manual adjustments needed on my part.
When I initially set up my Starlink Dish, I was amazed at how it stealthily oriented itself towards space. It practically took all the hard work out of my hands and made the process surprisingly smooth and straightforward for me. With no effort on my end, within a few moments, it successfully established a solid connection.
The self-aiming mechanism eliminates all notions of trial and error when finding a signal. My traditional satellite used to require multiple attempts before establishing stable reception—the days spent battling with wrenches and screwdrivers are long gone!
Moreover, let’s please appreciate that even those among us who aren’t technologically knowledgeable can now install this high-tech appliance without assistance or needing prior experience! That convenience factor alone speaks volumes about why opting for Starlink Dish Placement should be an easy decision for you as well!
So there you have it. The magic behind how effortlessly your ultra-modern 20th-century Starlink Satellite targets its galactic counterparts lies in its superior self-aiming feature – indeed, a blessing for us living in this age!
Maintenance And Relocation Of This Space Technology
When it comes to Starlink dish placement, one of the questions I often get is about the need for periodic adjustments and relocations. Well, let’s dive into that in more detail.

Periodic Adjustments and Relocations Required?
A common myth is that once you’ve mounted your Starlink dish, you might have to move or adjust it frequently. This can be concerning as no one wants to climb up their roof every now and then for an eventual adjustment.
But here’s the truth: you do not need frequent adjustments with your Starlink Dish placement! The ultra-modern technology within your Starlink dish is pretty smart. It’s designed to do its job without constant tuning or meddling from us.
Why so? This isn’t any ordinary satellite system we’re talking about – it’s Starlink, an advanced space-based internet technology created by Elon Musk’s company SpaceX.
Once properly mounted at a spot where it has an unobstructed view of the sky, your Starlink dish uses a self-aiming feature to position itself accurately toward the sky. It means that the dish will automatically locate and face one of many SpaceX satellites zipping into low earth orbit overhead. No manual effort is needed!
And what’s even more amazing! This smart fresnel lens equipped in its belly helps focus incoming signals irrespective of their angle of arrival, thus helping negate any effect of non-optimality due to unit orientation from true north.
So, rest assured knowing this – you are not required to go through constant relocation or tweak hassle to maximize internet performance once you handle initial Starlink Dish Placement correctly.
However, if at any point post-installation, there are significant changes around – like construction of a new building obstructing clear sky-view, shifting residence, or simply wishing to diversify usage across another place within premises relocation becomes necessary.
Also Read: Bypass the Starlink Router: Ultimate Easy Steps Guide
FAQs
Where is the best place to mount the Starlink dish?
The best place for Starlink Dish placement would be a clear, unobstructed outdoor area. Usually, it’s rooftops or yards that work effectively. Ensure it has an unblocked sky view.
Where is the best place to put a Starlink router?
Place your Starlink router in a central location of your home or office for optimal coverage. Avoid hiding it behind objects or inside cabinets as this might decrease signal strength.
How do I rotate my Starlink dish?
In general, you don’t need to rotate your dish manually. The brilliance of the Starlink Dish lies in its self-aiming capability – it automatically adjusts its orientation towards space for maximum connectivity.
Can Starlink dish be indoors?
No, the starling dish must be placed outdoors as it needs a clear and unobstructed view of the sky to receive signals properly from satellites. Placement indoors may lead to poor connectivity.
Also Read: Starlink Travel Case Review: Must-Have Accessory?
Conclusion
Starlink dish placement plays a critical role in receiving uninterrupted and optimal connectivity. It should be an essential task performed with care.
From the selection of the mounting surface to the survey of possible obstructions and checking the dish’s orientation, every step helps ensure smooth communication with SpaceX satellites.
Interestingly, the innovative self-aiming mechanism makes your job easier! However, remember that periodic adjustments might be necessary despite this advancement in technology.