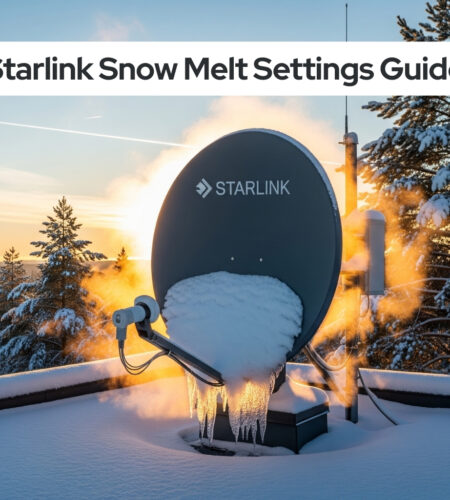
Winter weather shouldn’t disconnect you from the world. When snow starts piling up on your Starlink dish, your high-speed internet connection can suffer dramatically. Heavy snow accumulation blocks satellite signals, leading to frustrating outages right when you need connectivity most.
The solution lies in Starlink’s intelligent snow melt functionality. Navigate to Settings > Starlink > Snow Melt in your app to access three powerful modes: Off, Automatic, and Pre-heat. Each mode offers different power consumption and performance levels designed for specific weather conditions and user needs.
This comprehensive guide covers everything from basic setup to advanced optimization strategies. You’ll discover how to choose the right mode for your climate, minimize power consumption, troubleshoot common issues, and maintain reliable winter connectivity regardless of weather conditions.
| Snow Melt Mode | Power Usage | Best For | When to Use |
|---|---|---|---|
| Off | Minimal | Warm climates | No snow expected |
| Automatic | Variable (up to 50W) | Most users | Default recommended |
| Pre-heat | Maximum | Heavy snow areas | Before storms |
Understanding Starlink Snow Melt Technology
How Starlink Dishes Generate Heat (No Dedicated Heater Myth-Busting)
Contrary to popular belief, Starlink dishes don’t contain dedicated heating elements. The heat comes from the antenna’s normal operation as it communicates with satellites orbiting overhead. When your dish requires more power to maintain signal quality, it generates additional heat as a natural byproduct.
This design approach keeps costs down while providing effective snow clearing capabilities. The phased array antenna contains numerous small circuits that become warm during operation, especially when working harder to penetrate atmospheric interference.
Understanding this principle helps explain why your Starlink snow melting settings work differently than traditional heated satellite dishes. The system prioritizes signal quality first, with snow melting occurring as a beneficial side effect.
Signal-to-Noise Ratio (SNR) Detection Method
Your Starlink dish doesn’t actually detect snow directly. Instead, it monitors the signal-to-noise ratio (SNR) from satellites and adjusts power accordingly. When snow, rain, or atmospheric conditions reduce signal quality, the system automatically increases power output.
This intelligent approach means your dish responds to any signal degradation, not just snow. Cloudy skies, heavy rain, or even extreme cold can trigger the heating response as the system works to maintain optimal connectivity.
The SNR monitoring happens continuously in the background. Your Starlink internet melt settings determine how aggressively the system responds to these signal quality changes, balancing performance with power consumption.
Power Consumption and Heating Process
During active heating, your Starlink dish can consume up to 50 watts of additional power. This occurs in short bursts rather than continuously, making the actual power impact more manageable than you might expect.
The heating process typically activates within minutes of detecting signal degradation. Most users report seeing snow begin melting almost immediately once the system ramps up power output.
Power consumption varies significantly between dish models. The High Performance dish has the largest power supply and fastest snow clearing capability, while the Mini dish may struggle with heavy accumulation due to its compact design.
| Dish Model | Max Power | Snow Clearing Speed | Best Use Case |
|---|---|---|---|
| Standard | Moderate | Good | Residential |
| High Performance | High | Excellent | Heavy snow areas |
| Mini | Low | Limited | Light snow only |
Step-by-Step Guide to Access Snow Melt Settings
Requirements and Prerequisites
Before adjusting your Starlink snow melting settings, ensure you’re logged into the official Starlink app with the account associated with your service. You’ll need either the mobile app (iOS or Android) or web access through a connected device.
Your dish must be online and functioning for remote setting changes. If you’re away from home, your dish needs an active internet connection to receive configuration updates from the app.
For local access, connect to your Starlink WiFi network directly. This allows setting adjustments even if your dish is temporarily offline or stowed for maintenance.
Navigating the Starlink App Interface
Open your Starlink app and tap the “Settings” option from the main menu. This takes you to the configuration hub where you can manage both dish and router settings.
Select “Starlink” rather than “Router” to access dish-specific controls. This section contains all hardware settings including snow melt configuration, stow commands, and diagnostic information.
Look for the “Snow Melt” option within the Starlink settings menu. The interface may vary slightly based on app version, but this setting remains consistently available in the dish configuration section.
Alternative Access Methods (Web Interface)
If you prefer browser-based control, connect any device to your Starlink network and navigate to the official Starlink support portal. Log in with your account credentials to access similar functionality.
Web access provides identical snow melt controls with a larger screen interface. This option works well for users who prefer keyboard navigation or need to make adjustments from a computer.
Both mobile and web interfaces sync automatically, so changes made in either location appear immediately across all access methods. Choose whichever interface feels more comfortable for your workflow.
Step-by-Step Process:
- Open Starlink app or web interface
- Log in with your account credentials
- Navigate to Settings
- Select “Starlink” (not Router)
- Choose “Snow Melt” from the menu
- Select your preferred mode
- Settings save automatically
The Three Starlink Snow Melt Modes Explained
Off Mode: When and Why to Use
Off mode disables power increases for snow melting, making it the most energy-efficient option. Your dish operates at minimum power levels, reducing electricity consumption and heat generation to absolute minimums.
This setting works best in warm climates where snow accumulation never occurs. RV users in desert regions or coastal areas with mild winters benefit from the power savings without sacrificing necessary functionality.
Consider off mode during summer months even in colder climates. Switching seasonally helps reduce unnecessary power consumption while maintaining optimal performance when heating becomes essential again.
Automatic Mode: The Default Smart Choice
Automatic mode represents the perfect balance for most users. The system monitors signal quality continuously and increases power only when atmospheric conditions degrade performance below acceptable thresholds.
This intelligent approach conserves energy during clear conditions while providing immediate response to weather challenges. Your dish heats up precisely when needed, melting snow and ice without wasting power during good weather.
Starlink recommends automatic mode as the default setting for good reason. It handles variable weather conditions effectively while minimizing user intervention and power consumption throughout changing seasons.
Pre-Heat Mode: Proactive Storm Preparation
Pre-heat mode runs your dish at elevated power levels continuously, maintaining higher surface temperatures to prevent snow accumulation before it starts. This proactive approach works exceptionally well when you know storms are approaching.
The constant heating prevents ice formation and keeps snow from bonding to the dish surface. Heavy snowfall situations benefit dramatically from this preemptive strategy, maintaining connectivity throughout severe weather events.
Use pre-heat mode strategically rather than continuously. Activate it before predicted storms, then return to automatic mode once conditions improve to balance performance with reasonable power consumption.
| Climate Type | Recommended Mode | Alternative Option | Key Benefit |
|---|---|---|---|
| Tropical/Desert | Off | Automatic | Maximum power savings |
| Temperate | Automatic | Off (summer) | Balanced performance |
| Heavy Snow | Automatic | Pre-heat (storms) | Reliable connectivity |
| Extreme Cold | Pre-heat | Automatic | Continuous protection |
Optimizing Snow Melt Settings for Your Climate
Light Snow Regions: Balancing Power and Performance
Areas receiving occasional light snowfall work best with automatic mode year-round. The system responds appropriately to infrequent weather events while maintaining energy efficiency during clear periods.
Monitor your Starlink network performance during first snowfall to verify automatic mode handles local conditions effectively. Most temperate regions find this setting provides excellent results without manual intervention.
Consider switching to off mode during extended warm periods. Spring through fall operation in automatic mode, with seasonal adjustments to off mode, optimizes both performance and power consumption.
Heavy Snow Areas: Maximum Protection Strategies
Regions with consistent heavy snowfall benefit from more aggressive approaches. Start with automatic mode as your baseline, but prepare to switch to pre-heat mode when major storms approach.
Proper Starlink dish placement becomes crucial in heavy snow climates. Elevated mounting positions and clear sight lines help even the most effective heating systems maintain connectivity.
Consider leaving automatic mode active throughout winter months rather than seasonal switching. The continuous monitoring helps prevent ice buildup that might overwhelm the system during sudden weather changes.
Extreme Cold Climates: Special Considerations
Sub-arctic conditions challenge even the most robust satellite systems. Pre-heat mode often becomes necessary for extended periods, maintaining dish functionality despite extreme temperatures and persistent snow coverage.
Power consumption increases significantly in extreme conditions, but connectivity often becomes essential for safety and communication. Factor increased electricity costs into your overall Starlink internet costs when budgeting for winter operation.
Monitor icicle formation carefully in extreme cold. While normal around dish edges, excessive ice buildup may require manual removal to prevent motor strain on actuated models.
RV and Mobile Users: Power-Conscious Settings
Mobile users face unique challenges balancing connectivity needs with limited power resources. Battery-powered setups require careful consideration of heating power consumption versus communication requirements.
Off mode works well during travel through warm regions, switching to automatic when entering areas with potential snow accumulation. This strategy conserves battery power while maintaining necessary functionality.
Consider the Starlink router mini for mobile applications requiring maximum power efficiency. The compact design reduces overall system power consumption while maintaining essential connectivity features.
Power Management and Energy Efficiency Tips
Understanding Power Consumption (Up to 50 Watts)
Snow melt heating can add up to 50 watts to your Starlink’s power consumption during active periods. This represents roughly a 40-50% increase over normal operation levels, making power awareness essential for budget-conscious users.
The additional consumption occurs in bursts rather than continuously. Active heating typically lasts minutes rather than hours, reducing the actual impact on monthly electricity bills compared to constant high-power operation.
Calculate potential costs by monitoring heating frequency during typical weather patterns. Most users find the power increase represents just $5-15 monthly during winter months, depending on local electricity rates and weather severity.
Timing Strategies for Off-Peak Usage
Strategic timing helps minimize power costs in areas with time-of-use electricity pricing. Pre-heat mode works best when activated during off-peak hours before storms rather than during peak rate periods.
Morning activation often provides the best balance. Starting pre-heat mode during low-rate early morning hours warms the dish before afternoon storm systems typically arrive in many regions.
Monitor weather forecasts actively rather than leaving pre-heat mode running continuously. Targeted activation saves significant power while providing storm protection when actually needed.
Battery System Considerations for Off-Grid Users
Off-grid installations require careful power budget management. Snow melt heating can drain battery systems rapidly if not planned appropriately for winter conditions and reduced solar charging.
Size your battery bank considering winter heating loads in addition to normal communication power requirements. Many off-grid users find they need 25-40% additional battery capacity for reliable winter operation.
Consider manual snow removal as a backup strategy during extended cloudy periods. Physical clearing occasionally helps preserve battery reserves while maintaining connectivity during critical communication needs.
Power Optimization Checklist:
- ✅ Monitor heating frequency during typical weather
- ✅ Calculate monthly cost impact for budgeting
- ✅ Use pre-heat mode strategically, not continuously
- ✅ Consider off-peak timing for power-intensive heating
- ✅ Size battery systems for winter heating loads
- ✅ Plan manual removal backup for extended bad weather
Troubleshooting Common Snow Melt Issues
“Heating” Message Appearing Without Snow
Seeing heating messages during clear weather often confuses users, but this behavior is completely normal. Your dish responds to signal quality degradation from various atmospheric conditions, not just visible precipitation.
Rain, dense clouds, or even temperature extremes can trigger heating responses as the system works to maintain optimal signal-to-noise ratios. The heating helps compensate for signal attenuation through various weather conditions.
Don’t disable heating because of clear-weather activation. The system’s intelligent response to signal quality ensures consistent performance across all atmospheric conditions, not just obvious snow situations.
Snow Not Melting Despite Settings
If snow persists despite proper settings, verify your dish has adequate power supply and all connections remain secure. Loose power connections can limit heating effectiveness even with correct software settings.
Check for excessive ice buildup around the dish base that might insulate the heating area. Manual snow removal around the mounting area sometimes helps restore heating effectiveness.
Consider switching temporarily to pre-heat mode during persistent snow events. The higher power output often overcomes conditions that challenge automatic mode operation.
Excessive Icicle Formation Problems
Icicle formation around dish edges indicates proper heating function rather than problems. The melted snow naturally flows to cooler edges where it refreezes, creating normal ice accumulation patterns.
Remove icicles gently if they become large enough to contact roofing or pose safety hazards. Use warm water rather than tools to avoid damaging the dish surface or internal components.
Monitor icicle formation on actuated dishes particularly carefully. Excessive ice near moving parts can strain motors and cause “motors stuck” error messages requiring professional attention.
Rectangular vs Round Dish Performance Issues
Rectangular dishes reportedly experience more winter weather challenges compared to original round models. The flatter profile and different power characteristics can struggle with heavy snow accumulation situations.
Users with rectangular dishes often benefit from more aggressive heating settings. Consider using pre-heat mode more frequently during winter months to compensate for reduced heating effectiveness.
If winter performance becomes consistently problematic, contact Starlink support about potential dish replacement options. Some users have successfully upgraded to High Performance models for improved winter reliability.
Quick Diagnostic Steps:
- Verify Settings: Confirm snow melt mode is set correctly
- Check Connections: Ensure all power cables are secure
- Clear Base Area: Remove ice buildup around mounting area
- Monitor App Messages: Look for specific error codes or alerts
- Test Mode Changes: Try switching between automatic and pre-heat
- Contact Support: Reach out if problems persist after troubleshooting
Advanced Tips and Pro Strategies
Preventing Ice Buildup Around Dish Base
Ice accumulation around the mounting area can interfere with actuated dish movement and reduce heating effectiveness. Regular inspection and preventive clearing maintain optimal system performance throughout winter months.
Apply gentle heat to stubborn ice using warm water rather than tools or chemicals. Mechanical removal risks damaging delicate components or waterproof seals that protect internal electronics.
Consider improving drainage around the mounting area during installation. Proper water runoff prevents large ice formations that might interfere with dish operation or create safety hazards.
Manual Snow Removal Best Practices
When manual clearing becomes necessary, use soft brushes or warm water rather than rigid tools. The dish surface contains sensitive antenna elements that damage easily with aggressive cleaning methods.
Clear snow from the center outward in a radial pattern. This approach prevents redistributing snow over already-cleared areas and ensures complete surface cleaning for optimal signal reception.
Never attempt manual removal while the dish is actively heating. Hot surfaces can cause injury, and temperature shock from cold snow on heated components might damage internal elements.
Monitoring SNR for Optimal Performance
Advanced users can monitor signal-to-noise ratio through the Starlink app’s statistics section. Understanding SNR patterns helps predict when heating activation becomes necessary for maintaining connectivity.
Normal SNR values range from 8-12 dB during clear conditions. Values below 6 dB typically trigger heating responses as the system works to maintain acceptable communication quality.
Track SNR trends during different weather conditions to understand your installation’s specific performance characteristics. This data helps optimize heating settings for local environmental challenges.
Seasonal Setting Adjustments
Develop a seasonal adjustment routine rather than “set and forget” approaches. Spring activation of automatic mode, summer switching to off mode, and fall preparation for winter heating maximizes both performance and efficiency.
Document effective settings for your specific location and conditions. Personal records help quickly establish optimal configurations when weather patterns change or equipment requires reconfiguration.
Consider Starlink troubleshooting procedures as part of seasonal maintenance. Regular system health checks prevent small issues from becoming major problems during critical weather periods.
Expert Maintenance Schedule:
- Spring: Switch to automatic mode, inspect for winter damage
- Summer: Consider off mode in warm climates, clean accumulated debris
- Fall: Test heating function, verify settings before winter weather
- Winter: Monitor performance, clear ice regularly, document effective settings
Frequently Asked Questions About Starlink Snow Melt Settings
Does snow melt work with custom routers?
Yes, snow melt functionality operates independently of your router choice. The heating system connects directly to dish hardware and functions normally whether you use the included Starlink router or your own networking equipment.
Custom router users access settings through the Starlink app exactly like standard installations. The heating controls remain in the Starlink hardware section rather than router configuration menus.
Can I leave pre-heat mode on all winter?
While technically possible, continuous pre-heat mode operation significantly increases power consumption without proportional benefits. Most users find automatic mode provides excellent winter performance while conserving energy during clear periods.
Reserve pre-heat mode for predicted storms or particularly challenging weather events. Strategic activation provides storm protection while avoiding unnecessary power consumption during normal winter conditions.
Why does my dish show “heating” when it’s not snowing?
Heating activation responds to signal quality degradation from any atmospheric condition, not just visible snow. Rain, clouds, temperature extremes, and even atmospheric pressure changes can trigger heating responses.
This behavior indicates proper system function rather than malfunction. The intelligent response to signal quality ensures consistent connectivity across all weather conditions that might affect satellite communication.
How much does snow melt increase my power bill?
Most users see $5-15 monthly increases during winter months, depending on local electricity rates and heating frequency. The 50-watt maximum power increase occurs in bursts rather than continuously, limiting actual cost impact.
Calculate personal costs by monitoring heating activation frequency during typical weather patterns. Starlink outage tracking can help identify whether heating effectively prevents weather-related disconnections.
What’s the difference between dish models for snow performance?
High Performance dishes offer superior snow clearing capability due to larger power supplies and enhanced heating effectiveness. Standard dishes provide adequate performance for most conditions, while Mini dishes may struggle with heavy snow accumulation.
Consider upgrading to High Performance models if you experience consistent winter connectivity issues. The improved heating capability often justifies the additional cost in challenging snow climates.
Conclusion and Winter Connectivity Success
Mastering your Starlink snow melting settings ensures reliable winter connectivity without unnecessary power waste. The three-mode system provides flexibility for every climate and usage scenario, from tropical efficiency to arctic reliability.
Key Takeaways:
- Automatic mode works best for most users – balances performance with reasonable power consumption
- Pre-heat mode provides storm protection – use strategically before severe weather events
- Power management matters – monitor consumption and adjust settings seasonally
- Manual clearing supplements heating – combine technology with practical maintenance
Recommended Settings by User Type:
- Warm Climate Users: Off mode with seasonal automatic switching
- Temperate Regions: Automatic mode year-round with storm pre-heating
- Heavy Snow Areas: Automatic baseline with frequent pre-heat activation
- Off-Grid Installations: Careful power management with strategic heating timing
Take a proactive approach to winter preparation rather than waiting for connectivity problems. Monitor weather forecasts, understand your local conditions, and adjust settings based on actual performance rather than assumptions.
Remember that Starlink’s waterproof design handles winter weather effectively when properly configured. Combined with appropriate snow melt settings, your satellite internet can maintain reliable connectivity throughout even the most challenging winter conditions.
Start monitoring your system’s winter performance now to develop effective strategies for your specific location and usage patterns. Successful winter connectivity comes from understanding your equipment and optimizing settings for local environmental challenges.